
Bienvenido! Welcome to Cuba, the largest island in the Caribbean! Our month-long study of Cuba will begin with a geography lesson. Then, we will learn about the ancient people of the island, as well as the unique animals that inhabit it today―including the smallest bird in the world! The beautiful landscape and botany of Cuba will also provide us with the foundation for several science lessons about the inner workings of plants and their classifications. Finally, we will explore one of Cuba’s most valuable natural resources, sugar. And, of course, we will make some sweet desserts! Begin by downloading and printing your skills tracker. Dale! Let’s go!!
What you need:
Books (find at your local library or order below on Amazon):
- Trees, Leaves, Flowers and Seeds: A Visual Encyclopedia of the Plant Kingdom by DK
- What’s Chemistry All About? by Usborne (or read it here on OpenLibrary)
Supplies (use what you have, but here are links to shop if you need anything):
Note: We break down our supply list so you can choose what you need based on which lessons you plan to do with your child.
Watercolor map activity:
- 12×18 cardstock paper
- watercolors (blue, green, yellow) and brush (kit also includes a black tip marker which you need for this activity.)
- masking tape
- black fine-tip marker
Seashell STEM base and acid experiment:
- this printable
- 8 small sea shells
- 8 clear glasses or jars (with lids, if possible)
- vinegar, lemon juice, cola product, soy or almond milk, black coffee, baking soda water, ammonia, laundry detergent, and distilled water
- litmus paper
- paper or index cards
Cassava Bread recipe:
Hummingbird feeder:
- plastic bottle with squeeze-top lid (like a clean ketchup bottle)
- cotton ball
- rubber bands
- flowers (fresh or fake)
- yarn
- water
- sugar
Palm tree art:
- acrylic paint (sky blue, turquoise, dark green, light green, brown, white) and paint brushes (we’ve linked a set that includes both)
- plastic forks
- paint palette for color mixing (a plate works, too)
- water dish
- canvas or white cardstock
Flan recipe:
- 2 cups of sugar
- 5 eggs
- vanilla extract
- 12 ounce can of condensed milk (or coconut condensed milk)
- 12 ounce can of evaporated milk (or coconut evaporated milk)
What to do:
We recommend doing the below lessons in this order to build on each skill your child will develop, but don’t feel that you *need* to do them in this order. Do what works for you and your child. If they love an activity, feel free to repeat! Not a winner? Skip and try the next thing. Have fun!
Lesson 1:
Let’s begin with some geography and map work!
Activity 1: Cuba, officially called the Republic of Cuba, is an island in what is known as the Greater Antilles, a chain of islands created millions of years ago when two of Earth’s tectonic plates collided. Cuba is a long and narrow island. It stretches 750 miles (1,200 kilometers) from east to west, but is only 60 miles (100 kilometers) wide in most places. High mountains and rolling hills cover about one-third of Cuba. The other two-thirds of the island are lowland plains used mainly for farming. (source)
The deep, broad waters of the Straits of Florida separate Cuba from Florida, USA. To the northwest, Cuba is adjacent to the Gulf of Mexico. Interestingly, in terms of geology, Cuba remains part of North America as the division between the Caribbean and North American tectonic plates lying under the Caribbean Sea runs south of Cuba, east to west. (source)
Locate Cuba in an atlas, a map or using Google Earth.

(source)
Let’s make a map of our own using the map above as your guide. Create the map of Cuba using the technique in this mapping activity. Allow the map to dry and use it for Activity 2.
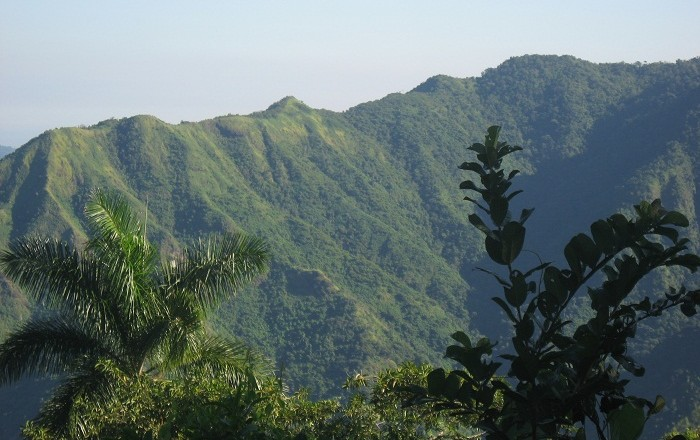
Activity 2: There are three mountain ranges in Cuba. To the west lie the lower mountains of the Sierra del los Órganos along with the Sierra del Rosario make up part of the Guaniguanico mountain range where deep limestone deposits have created a unique landscape of flat-topped mountains topping precipitous cliffs. In the center of the island, you will find the Sierra de Trinidad. In the eastern portion of this region lies the Sierra Maestra, which is made of limestone, various igneous rocks, and lavas. (source)
As you learn about each mountain range, draw them into your dried watercolor map with a black sharpie. You can use the map below to help you or click here and scroll down to the elevation map.
The Sierra de Trinidad lies in central Cuba, north of Trinidad. This mountain range (the second largest in the country) has many beautiful caves and rivers as well as grottos and canyons. Click here to see images of the second largest mountain in this range. In the surrounding hills, you can find Cuba’s national flower, the mariposa, West Indian mahogany, and over 40 indigenous species of orchids.

(source)
In eastern Cuba, you can find the island’s highest mountain range, the Sierra Maestra, which lies in the Gran Parque Nacional Sierra Maestra. The imposing range rises to Cuba’s highest point, Pico Turquino.
(source + click here to see more images)
The southeast’s Sierra Cristal mountain range is home to two national parks: the Parque Nacional Sierra Cristal and Parque Nacional la Mensure. The Sierra Cristal National Park was founded in 1930, making it Cuba’s oldest national park. Parque Nacional la Mensura is home to Cuba’s highest waterfall as well as an impressive research center established by the Cuban Academy of Sciences. (source) Click here to see pictures of this mountain and the national parks.
Cordillera de Guaniguanico extends about 40 mi (64 km) northeast. It includes the Sierra de los Órganos and the Sierra del Rosario mountains. Extensive pine and oak forests cover the area, and mineral springs occur along fault lines. The Guaniguanico includes the waterfalls of Salto de Soroa. Click here to see pictures of the Salto de Soroa.
Activity 3: The Cuban flag is also known as the “Bandera de la Estrella Solitaria” (Flag of the Single Star). The national flag of Cuba consists of three colors (blue, red, and white) and five irregular bands. There is a red triangle at the hoist and a white five-pointed star. It was created during the Cuban War of Independence and formally accepted on May 20, 1902 as a symbol of Cuba’s independence from Spain. The blue bands are for the three original districts, the red is for the soldiers who fought for freedom, white symbolizes purity, and the star represents freedom.

Let’s focus on the red triangle for our math application lesson. First, watch this video to learn how to find the area of a triangle. (The first 5 minutes will remind students about finding the area of a square. If your child already knows this step, skip the video to 4:50 to learn how to find the area of a triangle.)
Find the area of a few triangles to practice this new skill. Remember, the formula is A=½(BxH). Use page 1 of this printable to practice a few examples. (Check your answers with this online calculator.)
Activity 4: Let’s learn more about triangles. There are two ways to classify triangles: by their sides or by their angles. Watch this video to learn more.
Types of triangles according to their sides:
- Equilateral triangle: It has three equal sides.
- Isosceles triangle: It has two equal sides.
- Scalene triangle: It has no equal sides.
Types of triangles according to their angles:
- Acute triangle: It has three acute angles.
- Right triangle: It has one 90º angle.
- Obtuse triangle: It has an obtuse angle.
Play this online game to practice our new skill.
Next, look at page 2 of this printable of a Cuban flag to practice identifying triangles.
(+) Want more? learn how to classify angles in this video. Practice finding the missing angles with these problems.
Lesson 2:
In today’s activities, we’ll learn more about Cuba’s ancient history.
Activity 1: History is divided into distinct periods. Before 0 A.D., historians divide historical periods into three groups: the Stone Age, the Bronze Age, and the Iron Age. This method of periodization is largely used to categorize the artifacts found throughout history, identifying the type of tools humans were using. Early civilizations and events occur within these three time periods in history. Examining the ancient artifacts of early inhabitants helps archaeologists make assumptions about the people who used or made them. The timing of the periods vary greatly depending on the historian or organization you research, as well as the specific place you are learning about, so we will not use dates to categorize these periods, but rather their characteristics. (source + source) It is also important to note that these ages are not exclusive. For example, there are still people and civilization who use what are considered “stone age tools.” And as people began using new tools, they sometimes continued to use the old ones. (source)
- The Stone Age: The time when humans began using stone tools.
- The Bronze Age: A movement from humans using stone tools to bronze. Bronze was made by melting tin and copper, and mixing them together. The bronze could then be poured into molds to create useful items. Although people started using bronze in the Bronze Age, they still used flint and stone tools. (source)
- The Iron Age: This period began with people making tools and weapons from iron and steel. Humans may have smelted iron sporadically throughout the Bronze Age, though they likely saw iron as an inferior metal. Iron tools and weapons weren’t as hard or durable as their bronze counterparts. The use of iron became more widespread after people learned how to make steel, a much harder metal, by heating iron with carbon. (source)
All these classifications of time periods are found in the early history of Cuba. The island was inhabited by three different groups of indigenous peoples: the Taínos, the Ciboneys, and the Guanajatabeyes. Currently, scholars estimate that there were between 50,000-300,000 indigenous people occupying the island at the time. (source) Watch this video to learn about the migration pattern of the first people to inhabit the island. We will learn about all three in the next two activities.
Activity 2: The first of the early inhabitants, the Guanahatabey, was the oldest culture on the island. It was a shell culture, characterized by its use of shell gouge and spoon as its principal artifacts. The Guanahatabey might have come from the south of the United States, for their artifacts display certain similarities with those of some early inhabitants of Florida. Yet some archaeologists and anthropologists are more inclined to accept the theory that the Guanahatabey migrated from South America through the chain of islands in the West Indies until finally settling in Cuba. By the time of the Spanish arrival, they had retreated to the most western part of Cuba. The Guanahatabey built no houses and lived mostly in caves. They were fruit pickers and food gatherers and did little fishing or hunting. They seem to have relied on mollusks as their principal foodstuff. Their civilization apparently was in decline by the time the Europeans arrived. (source)
Seashells were used as tools in these ancient times by the Guantahatabey. Today, we will use seashells to test the effects of a variety of liquids, called acids and bases. Let’s learn about acids and bases. First, watch (-) this video or (+) this video. Next, read pages 56-59 of What’s Chemistry All About? (or read it here on Openlibrary), or you can read this article if you aren’t able to get the book.
Next, let’s conduct an experiment to see the effects of acids and bases on seashells.
What you need:
- 8 sea shells
- 8 clear glasses or jars
- vinegar, lemon juice, cola product, soy or almond milk, black coffee, baking soda water, ammonia, laundry detergent, and distilled water
- litmus paper
- index cards

What to do:
- Print this sheet to record your findings.
- Set up your glasses or jars with the 3-4 acids and 3-4 bases. Fill one glass with distilled water (this will be our control). Label each glass using index cards or paper.
- Litmus paper is a paper treated with a special dye that is used to assess whether a solution is acidic or basic, ranked on what is called the pH (or potential hydrogen) scale. Using your litmus paper, determine where each liquid falls on the pH scale. Record your findings on the printable.
- Put one shell into each of the seven jars in order to observe what affect the acids and bases will have on them.
- Make and record your hypothesis for what effect the liquid will have on the shell.
- Observe the sea shells over the next 2-7 days. What effect does the acid have on the shell? What effect does the basic liquid have? Finally, what effect does the water have on it? What other conclusions can you reach from your experiment?

Activity 3: The second cultural group, the Ciboney, was part of the larger South American Arawak group. The Ciboney inhabited western Cuba and the southwestern peninsula of Hispaniola. It is generally agreed that the Ciboney, as well as the more advanced Taino, the other Arawak group found in Cuba, originated in South America and had island-hopped along the West Indies. The Ciboney were a Stone Age culture and were more advanced than the Guanahatabey. They were highly skilled collectors, hunters, and fishermen and inhabited towns, usually near rivers or the sea. Some lived in caves while others had begun to inhabit primitive dwellings called bajareques or barbacoas. The Ciboney practiced some form of elementary agriculture, and their diet included turtles, fish, birds, and mollusks.
Two of the more typical artifacts they developed included a stone digger and a ball, both symbols of authority or high social status; they were also considered magical objects. The Ciboney fell prey to the more advanced Taino and became their servants, or nabories.
The Taíno people had complex hierarchical religious, political, and social systems. They were skilled farmers and navigators, they wrote music and poetry and created powerfully expressive objects. At the time of Columbus’ exploration, the Taíno were the most numerous indigenous people of the Caribbean and inhabited what is now Cuba, in addition to Jamaica, Haiti, the Dominican Republic, Puerto Rico, and the Virgin Islands. By 1550, the Taíno were close to extinction, many having succumbed to diseases brought by the Spaniards. Taíno influences survived, however, and today appear in the beliefs, religions, language, and music of Caribbean cultures. (source)
The Taíno were the most populous of several groups who inhabited Cuba when Columbus sailed into Baracoa harbor. He described them in his journal as a friendly and generous people who lived simply, noting pointedly, “They will make good servants.” He wasted no time in erecting a wooden cross on the shore. Not long after that, he enslaved the Taíno in the name of Spain. The Taíno began to die out quickly—from smallpox, violence, and overwork at the hands of the Spanish colonizers. But despite claims to the contrary, they didn’t disappear completely. Some fled into the mountains. Others mixed with colonists or Africans fleeing slavery, sometimes maintaining Taíno customs and farming practices. The colonial authorities refused to recognize the existence of the Taíno as a people, assigning their own last names to the remaining indigenous population. “[They wanted] to eliminate Indian identity so there would be no indigenous title to the land,” says José Barreiro, a member of the Taíno Nation of the Antilles and director of the Office for Latin America at the Smithsonian National Museum of the American Indian. But this did not stop some Taíno from asserting their land rights in court, albeit without success. The last indigenous land claim in Cuba was denied in 1850.(source)
Five centuries after the native’s fateful meeting with Columbus, elements of their culture endure—in the genetic heritage of modern Antilleans, in the persistence of Taíno words, and in isolated communities where people carry on traditional methods of architecture, farming, fishing, and healing. Another aspect of the Taino culture that survives is an ancient food―casabe, was one of the staples of the Taino diet. Cassava bread or pan de indios, as it is also known, is perhaps the oldest artisanal food on this Caribbean island, which is linked to its culinary and historic traditions and is ideal for ensuring food security, as the raw material doesn’t need to be imported. (source)
Would you like to try one of these dishes? Prepare this recipe for cassava bread.
Lesson 3:
Let’s learn about some of the native animals of Cuba.
Activity 1: The world’s smallest bird is found in Cuba! Meet the bee hummingbird. It is an absolute miniature, even among hummingbirds. It measures a mere two-and-a-quarter inches long. Use a ruler to measure 2 1/4 inches to get an idea of how very small this bird really is! They are so small that bee hummingbirds are often mistaken for actual bees. They weigh less than two grams—less than a dime. The female builds a nest barely an inch across, and her eggs are about the size of a coffee bean. Bee hummingbird’s tiny wings beat 80 times a second. (source)
Watch this video to get a close up look at this amazing animal.
Although you might not be able to see a bee hummingbird in your backyard, you might live in one of the many parts of the world where there are other species of hummingbirds. If so, let’s attract hummingbirds with a feeder. Follow these directions to make your very own DIY hummingbird feeder.
Activity 2: Discover flamingos. There is one species of flamingo found in Cuba, the American flamingo. The American flamingo is also found in Central and South America, and it is also occasionally seen in Florida and along the Gulf Coast. The American flamingo doesn’t nest in the U.S., but they do nest in Cuba. You can find them in the remote Rio Maximo Wildlife Reserve in the northern coast in the province of Camagüey, Cuba. The area is difficult to access and barely has any roads leading to it, making it a perfect place for flamingos to nest. It has been protected since 1998.

(source)
Do you notice the mounds of mud in the photo? Those are flamingo nests! Flamingos build very interesting nests. A flamingo nest is about 12 inches high and needs to be high enough to protect the egg from flooding and from the occasional intense heat at ground level. Both the male and female build the nest by drawing mud toward their feet with their bills. Flamingos lay a single large egg, which is incubated by both parents. Watch this video to see the habitat in action.
Learn more about the American flamingo here. Watch this video to learn more.
Aren’t you impressed with the flamingo’s ability to stand on one leg? Flamingos have the right idea when it comes to balancing. Let’s get up and do some physical fitness and balancing for ourselves. Start by doing a flamingo stand. For this exercise, you’ll balance on one leg while holding the other leg back as if you were a flamingo. As a bonus, you’ll be exercising your core, too, which also helps to improve balance. Next, do this exercise inspired by flamingos called “the flamingo balance.” Use a light weight or water bottle for this exercise. Next, let’s try a “flying flamingo.” You can see it demonstrated here. Start without any weights and add two 2-3lbs weights if you are feeling ready for a challenge.
(-) For more lessons and activities on flamingos, visit our Level 2: Birds Unit.
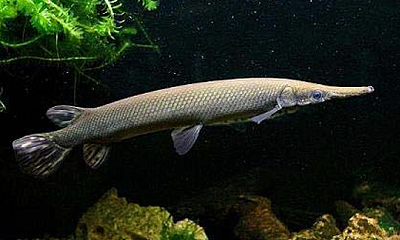
Activity 3: The Cuban gar, also called the manjuarí fish, can only be found in Cuba. The Cuban gar is found in the rivers and lakes of the Western Cuba and Isla de la Juventud. Considered an inhabitant of the rivers and the swamps, the manjuarí is one of the more primitive skeletal fish. The cylindrical and lengthened body of the Cuban gar is similar to a reptile. The head is flat like a crocodile, and the skull has extremely hard bones. Their mouth is also used like a powerful arm with three rows of small but sharp teeth. The long body of the Cuban gar is covered with a natural oil, which helps it move through the water with astonishing speed and helps it to escape from its enemies. The species that survives in Cuba is a dark green color, with a maximum length of two meters. (source)
Writing exercise: Use your imagination and create a new animal! Take two or more animals with distinct features and mix them together to make a new one. Write out your description of the animal, including details about its appearance and size. Use as many adjectives as possible. Think about its eating, sleeping, and living habits. What does it look like? (Color, shape, size, etc.) Where will it live? (Biome, environment) What will it be called? (Research Latin names for animals) Once you have written out your ideas, bring it to life by drawing it. You may also wish to create a lap book with all your details.
Activity 4: Discover the Cuban crocodile. Learn about the Cuban crocodile in this article. It is a critically endangered animal, but there are efforts being made to help them grow in number. Watch the video and read the article here to learn about conservation efforts.
This famous croc has even been on a Cuban stamp, as you see below.
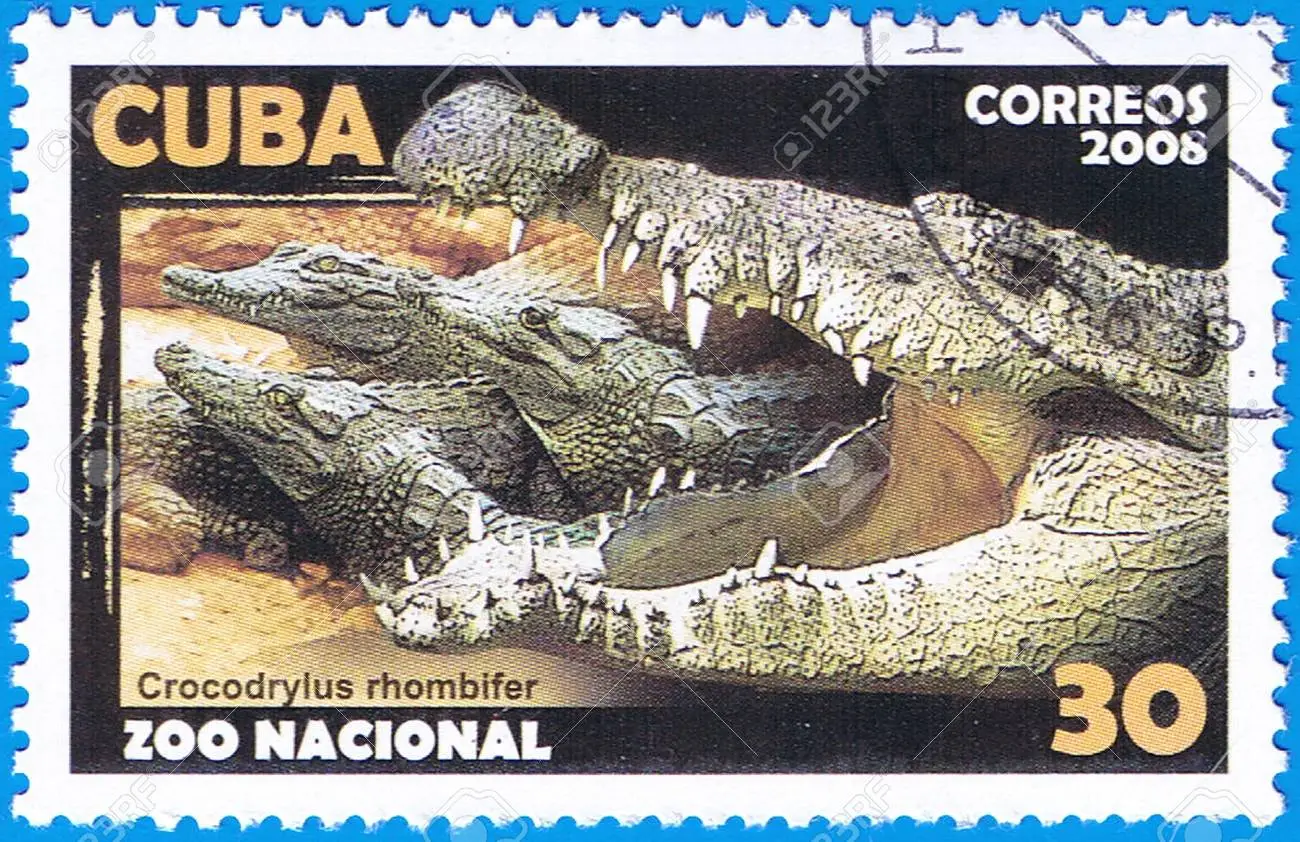
Let’s use this as the inspiration for our next project. Print this postcard onto cardstock. (Follow your printer’s directions to print this back to back.) Cut along the edges. Next, write a letter to a friend or family member telling them about the Cuban crocodile on the cover or something else you have learned about Cuba so far.
Watch this video to learn how to address a postcard. Remember, it must include the name of the recipient, their home and street address, the city, the state or province, and their postal code.
Lesson 4:
Today, we’ll take a closer look at the landscape and botany of Cuba.
Activity 1: Plants are categorized and named based on their characteristics. Learn about classifications in this video. Next, refer to the book Trees, Leaves, Flowers and Seeds: A Visual Encyclopedia of the Plant Kingdom, pages 10-11 to see a portion of these groupings.
Why do scientists classify plants? Here are four reasons:
- The main reason plant classification is done is to ensure that the right plants are named correctly for ease of identification and grouping.
- It helps identify new species.
- It helps us to remember the diversity of plants when they’re better organized.
- It help us identify relationships between different plants and other organisms.
As you saw in the video and in the chart illustrated in the book, one classification of plants are flowering plants. This group of plants then gets divided into two more groups: monocots and dicots. Let’s make this hands-on with this plant classification printable. As we learn about plants today and tomorrow (in Activities 2-4 and in Lesson 5), add the labels and pictures to the chart. You can also add details if desired, such as a definition for monocot and dicot. But first, let’s learn more about monocots and dicots in this video.
Activity 2: Read pages 110-111 to learn about different types of trees. Next, let’s learn more about the ceiba, or kapok tree. This tree lives in many parts of the earth including the tropics of Asia, West Africa, South America, and North America. It lives in the Amazon Rainforest, so we learned about it when we studied Level 3 Brazil: Week 3 and read the book The Great Kapok Tree: A Story of the Amazon Rain Forest by Lynne Cherry. But we also find this tree in Cuba, so let’s see what else we can learn about it.
The ceiba is a rapidly growing deciduous tree that reaches heights of 80 feet or more and a diameter of five to eight feet above its buttresses. The buttresses themselves can be up to ten feet tall and extend ten feet from the main trunk. The tree has a broad, flat crown of horizontal branches. The leaves are compound (grouped) with five to eight lance-shaped leaflets that are three to eight inches long. From December to February, the tree produces numerous five-part whitish to pink flowers, which occur in dense clusters and bloom before the leaves appear. Ceiba flowers open in the evening and are pollinated by pollen- and nectar-feeding bats. Their kapok-surrounded seeds are adapted for dispersal by wind. Ceiba trees may flower as little as once every 5 years, especially in wetter forests. Flowering is more frequent on forest edges or in drier sites. (source + source)
The ceiba tree has religious and historical significance in Cuba. For some people, it is considered to be sacred. The tree was highly revered by the natives who attributed it with magical-religious powers. People say that both the first religious ceremony and first town council meeting took place under its shade. For the practitioners of the Yoruba religion (the religion of formerly enslaved people from Nigeria), whoever plants a ceiba will have a connection to it―their life will depend on the care they give the tree. They also believe that their dead ancestors live on in the trees. (source + source)
Add a picture of Ceiba tree to our classification chart.
Practice knowing the different between monocots and dicots. Refer to this sheet to help keep the two groups clear. Next, play this game to reinforce what we’ve learned.
Activity 3: Next let’s learn about the Cuban Royal Palm.
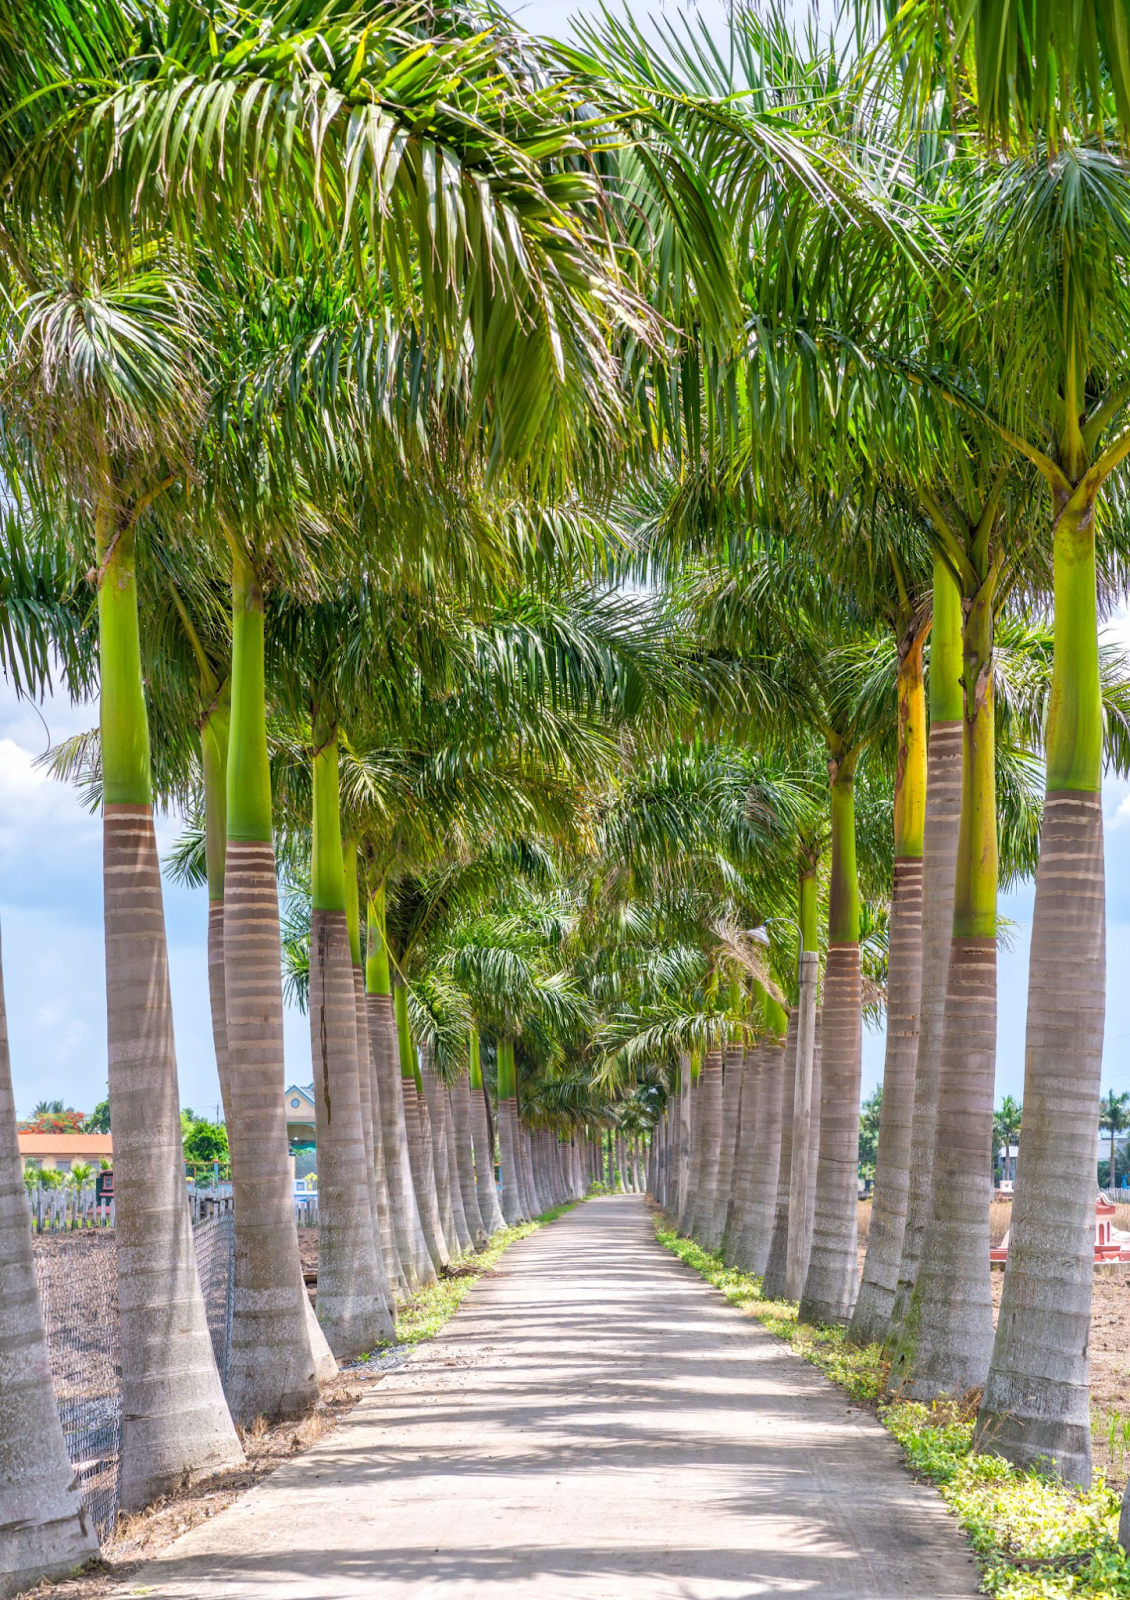
Palm trees are beautiful and imposing and can be seen all over the island of Cuba. A palm has many tree-like characteristics, but it’s a little sneaky. Palms are monocots, along with grasses, lilies or orchids. These plant groups don’t produce bark or annual rings like trees. A palm’s trunk is actually an elongated stem. Like a tree, it has leaves, flowers, and roots. Each of these parts has specific functions that make the palm trees unique in the ecosystem. Let’s break it down.
The stem of the palm tree is long and cylindrical. Some palms feel slightly rough on the hands, but the Cuban Royal Palm species is white and smooth and has a swollen base. Palm tree stems may also have sharp spines on their branches. You can also observe rings on the stems.

These rings on the outside of the stem indicate the age of the palm as they form every year. They may also have leaf scars left by leaves as the tree grows taller. Most of the stem does not have leaves. Unlike the xylem and phloem in other trees that must continually be replaced when their old cells die, the xylem and phloem cells in palm stems remain alive as long as a palm is still living. (We learned all about xylem and phloem in Level 3 Nigeria: Week 1, Lesson 2. A Cuban Royal Palm will grow to be 50-80 feet tall.
Palm leaves are known as fronds. Fronds (or groups of leaves) grow at the top of the palm tree like a crown. They are V-shaped. Depending on the species, the V may be upright or inverted. The upright V-shaped leaves are known as induplicate, while the inverted shape leaves are known as reduplicate.
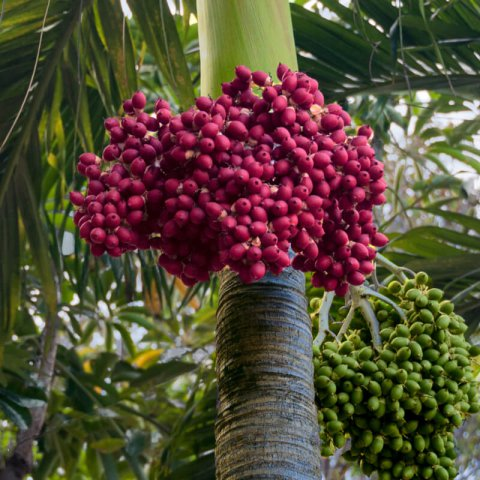
Royal palms sprout from distinctive purple seeds that are oblong. Birds and bats eat the fruits of the tree and spread the seeds. In addition to fruits, the royal palm sports very fragrant flowers―in some cases, you can smell their aroma from 50 feet away! Fruit and flowers grow on the tree year-round. The flowers are white with pinkish anthers. The fruits are green when immature, turning red and eventually purplish-black as they mature.
Palm roots have a fibrous root system. Thus, they do not grow deep but spread laterally around the tree like a mat. They grow up to 36 inches into the ground. You can see the roots of palm tree species that grow on shallow soils. Like other trees, the roots stabilize and anchor the palm tree. Like roots of other trees, palm tree roots keep the tree in the ground. Since they are not deep, though, they are easily uprooted by strong winds. (source, source + source)
Add a palm tree to your classification chart.
Now that you know so much about the palm, let’s try this art activity.
Activity 4: Discover orchids. Cuba is famous for its orchids, including the White Mariposa. Orchids are one of the most diverse of flowering plant families in Cuba, where some 497 species and varieties are known, of which about 181 (36%) are endemic (native) to the island. The White Mariposa, or Butterfly Jasmine, is Cuba’s national flower. Naturally, this endemic jasmine species grows in more humid places like lagoons, but it can be grown domestically as well. Historically, Cuban women transferred messages to men on the front line during the battles of independence using these flowers. (source + source) Visit this website to look at the beautiful variety of orchids on the island.
Orchids make beautiful house plants, but they can be difficult to grow. Learn how to care for an orchid in this blog post and video.
Add an orchid picture to your classification chart.
Lesson 5:
Ready for a super sweet lesson? Let’s learn about the science of sugar!
Activity 1: Sugar is an important natural resource in Cuba and has played a large part in its history. Sugarcane is in the same family as grass and grows in the form of tall, narrow stalks, or canes. Sugarcane is planted in ruts on its side in the fall. It requires no maintenance over the winter, and in spring you’ll be greeted with sugar cane sprouts that will grow as tall as bamboo. Watch this video to learn about the process to make sugar from sugarcane. Sugarcane is a monocot. Add a final sugarcane picture to your chart from Lesson 4.
Sugar plantations were labored on by enslaved people and became the main export of Cuba for centuries. (We will learn more about that in Week 2.) Sugar also influenced many of the dishes we will learn about today. If you have a sweet tooth, then a Cuban pastry shop is just where you want to be! You will find custards, pastries, cookies, and more. Today, we will learn about a famous Cuban dessert, flan! We will share our co-founder (who is Cuban!) Cynthia’s family recipe.
To make this dessert, we will first need to learn about dissolving sugars. If you look at sugar under a microscope, you will see that sugar crystals are solids that have a regular geometric shape. When simple sugars such as sucrose (or table sugar) are heated, they melt and break down into glucose and fructose, two other forms of sugar. Continuing to heat the sugar at high temperature causes these sugars to lose water and react with each other, producing many different types of compounds. These compounds are responsible for the different flavor elements of caramel, such as butterscotch, nutty, and toasty flavors. The increase in temperature causes the sugar to darken in color. (source)
When you dissolve sugar, it will look like caramel, but that’s actually a different substance because caramel includes other ingredients like milk or butter. (Watch this video to learn more about the science of making caramel.) For our recipe today, you will want the sugar to crystalize and but not harden. We will use a method called dry caramelization.
Here a few tips before getting started: The dry method for making caramelized sugar is also very simple, but has its advantages and disadvantages. The major advantage to the dry method is that the caramelization process happens very quickly. The major disadvantage to the dry method is, well, the caramelization process happens very quickly, meaning it can also burn quickly. The other advantage of the dry method is that it is not quite as at risk for re-crystallizing as it is with the wet method.(source)
Safety tip: This recipe requires adult supervision. The heated sugar is extremely hot and can cause severe burns if it touches skin.
Let’s prepare the sugar for our flan recipe. Follow these directions:
- Use a heavy bottom pan or a wide nonstick pan. Heat the pan and add 2 cups of granulated sugar slowly using a wooden spoon to stir.
- Stir until sugar dissolves completely and turns a medium-dark caramel color. (check this link for their color chart)
- Pour sugar into a loaf pan and turn the pan to spread the sugar along the sides of the pan. (see video below)
Allow the caramel to sit and harden as we move onto the next step in making a flan.
Activity 2: Flan is a firm custard. In order to make a custard, we need to learn about the coagulation of proteins. The process of changing liquid protein into a solid by heating it is called coagulation. Coagulation is one of the main reasons the texture of food changes when it is cooked. Meat and fish become firm, and batters change from liquids to solids. In fact, most baked goods have a “skeleton” of coagulated milk or egg protein that supports them. Custard is a homogeneous mixture of eggs and milk. Flan is a custard, and so we will see coagulation in action when we make it!
When eggs first coagulate, the protein is able to trap and hold other liquids, such as the water in the milk and egg whites. If eggs are cooked too long or at too high a temperature, they become tougher and tougher and can no longer hold water. Properly made custard is smooth, shiny, and firm. There is no trace of water from either the egg or the milk. (source: Science Experiments You Can Eat by Vicki Cobb, pages 91-92)
Let’s complete our flan recipe. Preheat oven to 400 degrees Fahrenheit.

Ingredients:
- 5 eggs
- 11.6 ounce can of sweetened condensed milk (or coconut condensed milk for dairy free)
- 12 to 13 ounce can of evaporated milk (or coconut evaporated milk or unsweetened coconut milk for dairy free)
- 1/4 teaspoon of kosher salt
- 2 teaspoons of vanilla extract
What to do:
- Combine all the ingredients in a blender until combined. (You can also use a hand mixer.) Add mixture to your caramelized loaf pan and tap on the counter to remove any air bubbles. Cover with aluminum foil.
- Place the loaf pan onto a 9×13 dish and place in the heated oven. Prepare a water bath. Using a tea kettle or pitcher, pour hot water around the loaf pan until it reaches about halfway up the sides of the loaf pan. The purpose of the water bath is to moderate the heat and ensure that the mixture cooks evenly into a smooth and creamy custard.
- Bake for 60 covered. Uncover and bake for 10-15 more minutes. (Depending on your oven, it might need even more time. Dip a cake tester into the center of the loaf. It should come out clean. You will notice some wiggle in the custard and that is perfectly fine.)
- Remove loaf pan from oven carefully. Uncover and allow to cool on the counter for about 30 minutes. This will allow the custard to set fully. Cover and cool overnight in the refrigerator. Remove from the cold and let stand for 30 minutes.
- To unmold the flan, run a knife along the sides of the pan. Carefully turn the loaf pan over onto a flat, rimmed plater. If the flan doesn’t release immediately, let it sit inverted for a minute and it should slide out. The sugared caramel will pour out over the custard. Slice into individual portions and pour the sauce over the top. Enjoy!


***Post contains affiliate links. If you make a purchase through a link, we may receive a small commission at no cost to you. Thank you for supporting our small business!***